My name is Shannon "Dabling" hence the title :) I am a mother of 3, stay at home mom, Creative Memories Consultant, and photographer. I have been a consultant twice so far, and have had my home photography studio for 7 years.


My goal for the year 2010 is to "Focus on Photos" and my mission is to help others with the same goal.

I love what I do and have met the most wonderful people through both of my business's. I hope that I can continue helping others.

Thank you for visiting my blog. If you have any additional questions my email is spdabling@msn.com.


Showing posts with label Gifts. Show all posts

New Creative Memories Digital Scrapbook Calendar

Tech Tips, New Product Review


6a0120a5490d2f970b0120a644b1b0970c

I am so excited about this NEW product! You can download free templates for this from my site HERE

 147143-2 147143-1

These are available for purchase through the CM photo center available November 1, 2009 for 20.99! What you need to know is that this is a 12x18 Calendar with the image area being 12x12. Now the really cool part about it is that the calendar tears off and then you have a 12x12 scrapbook print!!!

Dr. Mark Mizen Blogged about this calendar and you can read his post HERE

And this is a great Tech Tip Post from the Creative Memories blog too. Here is the LINK but it is also copied below.


Calendar Templates: Defining your time

6a0120a5490d2f970b0120a5e31ed1970b-800wi

tem•plate: A pattern or gauge, such as a thin metal plate with a cut pattern, used as a guide in making something accurately.

Corinne Wow. I made my first calendar pages this week. At first thought it was going to be cool to show you how you can drop in 12 x 12 pages or Page Prints you've already done into the calendar templates. However, that doesn't even begin to scratch at the surface of what you can do with the new calendar templates.

You can:
• import completed pages as photos and just drag and drop (or, you can copy/paste from another SBC+ file if you still have items you want to change)
• start from scratch and create something new
• make any photo or paper the background of the calendar
• change the calendar style
• change any month to a new month (switch January to July without starting over)
• change the color of anything in the calendar, change the fonts
• add photos, embellishments or text to any cell on the calendar

I discovered all kinds of versatility within the template. Check out the screen shots below to see some of the great things you can do with calendars.

cal•en•dar tem•plates: a starting point, a guide to making your calendars just the way you want.


Insert your already completed pages

Anypageascalendar

1. If you haven't already, save your pages as 300 dpi jpgs. From your calendar project, click on Get Photos. Import pages you want to use as photos.

2. Drag and drop on to calendar template. Size to fit the upper portion of the template.


Change the style of the calendars & adding a photo as your background

Claudia_calendar_1

1. It doesn't get much easier than this. Right click on the calendar grid to see the pop up menu. Go to "Use a different Calendar Style", choose your favorite from the pop up window.

2. Adding the photo as a background is amazingly simple too. From the content menu, choose your photo, right click and choose "Make background". That's it. (You can do this with paper too!)

3. Just like any StoryBook page you create, you can add any embellishments or type you like.

Personalize the calendar grid

Claudia_calendar_2

1. Right click the calendar grid, choose "properties" from the pop up menu. From this menu, you can change colors, fonts, spacing and more as it applies to the calendar grid. (see screen shot below)

Claudia_calendar_2a


Cells within the calendar

Claudia_calendar_final

1. Drag and drop an image or an element into any cell within the calendar. Or, right click the calendar grid and choose "Edit Calendar Cells" to add text or make other changes to the individual days of the month.

When you're all done creating your own unique and fabulous calendar grid, you can sample the grid and apply the same features to any other grid in your project.

Posted by Corinne Skoog on 10/13/2009 at 07:39 PM in Software Tips & Tricks, StoryBook Creator Plus Software | Permalink

Product Review: Personalized Poem and Frame.

(This Product is available through the Photo Center.)

For those special people in your life, a Personalized Poem & Frame is a unique,
affordable keepsake created in minutes – one they will treasure for a lifetime and
bring smiles every day.
• Poems exclusively written for Creative Memories
• Personalized with your photograph
• Easy to create, simply drag and drop your photos
• Sent to your door, matted and framed, ready to hang on your wall
• 8.5 x 16.5 Poem & Frame for $49.95

poem frame poem frame2

They are very easy to make. First you need an account at the Photo Center (if you already have account sign in at the top.)

Then, you have  to upload the photos that you would like to use to the photo center into an album.

Then, select Photo Gifts on the top bar and select Personalized Poem and Frame from the list of products.  Then just go through all the steps and you have a beautiful personalized gift or memento.

Last Minute Gifts

As you can tell with my lack of posting that the Holidays are coming. But I wanted to let you all in on a great sale.

20% off last minute gifts from Dec 5-20

11x14 Picfolio Milestones Album

12x12 Max Album

Mini Everday Display

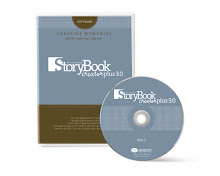
Storybook Creator Plus

Power Sort Memorabilia Box

Order right from my Website and have it delivered to your door.

sale

Happy Holidays

Shannon

Christmas Advent Calendar

This is a Darling Advent Calendar for Christmas using the Creative Memories Everyday Display Board. It is so cute. This is one of the projects you can pre-order and put together at my Christmas workshop.

 Advent Sample

Click the picture to see it bigger.

Christmas Workshop

December 4, 6-9 at my house.

email me to get directions and to register.

spdabling@msn.com.

Monday Product Review: Gifts under $50 Part 2

These little Paper Album Kits are SO cute and easy and only $16!

This is the Merry and Bright which is perfect for a Christmas gift. I am also going to host a Project Christmas Gifts workshop which will feature this Paper Album Kit as one of the projects.

merry and bright 


This kit includes

• 1 Paper Album
• 6 white pages/12 sides
• 14 sheets of double-sided printed papers
• 12 double-sided photo mats
• 1 sheet of epoxy stickers
• 1 sheet of die-cut flourishes
• 1 sheet of clear title stickers in black (English only)
• 1 envelope (extra postage required)


All you need is adhesive and Photos! Tada your done! I got mine done in 15 minutes!

Go to my site or contact me for information on the workshop.


Happy Holiday Shopping

Shannon

Monday Product Review: Gifts under $50

With Christmas coming around the corner (and will be here before we know it) Early Shopping can save you money and headache.

So I am going to start posting about those gift ideas that we want to put a lot of heart and thought behind, but not a lot of time or money.

So the Gift under $50 for today is the

Mini Everyday Display

mini display

This display makes great gifts for mom, grandmas, kids, and even dads.  This display is an open frame with a magnetic back. They come with matching magnets and mini clothespins. It can either been hung or it has an easel back for standing it up.

The mini display is 11.5x11.5 with an 8x8 opening. It comes in Black, White, or Chocolate for $35! You can order this directly from my site.

There is also a larger Everyday Display (well it's called the Everyday Display) and its 18x18 with a 13.5 x 13.5 opening and its $52.

I recently made one of these for my husbands grandma for her birthday this summer. I actually forgot about a gift, we always give her some sort of photo or memory gift. So being a consultant I had one of these in inventory. Luckily, because 5 minutes before we are to start loading the car, I thought "Oh my, What am I going to do for Grandmas present." I totally spaced it! So I looked around and remembered this frame.  I grabbed a few printed pictures, pulled out some paper for the background and quickly cropped and matted the few pictured I had and "TADA" a beautiful gift that looked like I spent a lot of time and money.


Happy Holiday Shopping

Shannon