My name is Shannon "Dabling" hence the title :) I am a mother of 3, stay at home mom, Creative Memories Consultant, and photographer. I have been a consultant twice so far, and have had my home photography studio for 7 years.


My goal for the year 2010 is to "Focus on Photos" and my mission is to help others with the same goal.

I love what I do and have met the most wonderful people through both of my business's. I hope that I can continue helping others.

Thank you for visiting my blog. If you have any additional questions my email is spdabling@msn.com.


Digi-Know Newsletter

Question of the month:

How do I ensure my StoryBook Creator Plus 3.0 project will not lose anything important when it's trimmed?

  1. Click the View tab.
  2. Select "Trimmed View" under the Preview Section. This will remove 1/4-inch from all sides of the project.
  3. Pay close attention to the edges before your order is placed. 
  4. On custom projects, keep all elements at least 1/2-inch from all edges.
Coupon Code Reminder

Come see why everyone's talking about Creative Memories photo books. And remember to redeem your $39.95 coupon code toward the purchase of a Hardcover StoryBook before it expires!

Softcover StoryBook Sale

Create a one-of-a-kind 7x5 photo book and take $5 off when you place an order!

Upgrade and Save

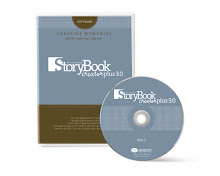
This month, save $10 when you upgrade to StoryBook Creator Plus 3.0 Software.

This is the year to“Focus on Photos”


focus logoCrop copy


Tough times usually brings with it perspective. It's time to begin remembering what is important in our lives and honoring them. Lots of us say we couldn't live without our pictures. I know for me my pictures helps me remember the good,  it saves my sanity from trying to remember every little moment, and brings me so much joy.

There are always cons that come with everything. Digital has been an evolving era that keeps changing. Which means that we have to try to keep up, and with the endless possibilities with our digital files, its gets overwhelming. The past is also not forgotten, a lot of us still have printed pictures and film that we still have in boxes. They are not less important because the aren't sitting on a hard drive. All our pictures are important and deserve to be looked at and remembered.

If this is also on your mind and in your heart maybe I can help. I have a personal mission to Focus on Photos this year. I take near to ten thousand pictures a year, including my personal and family pictures. That's a lot to edit and keep up on, and sometimes my personal photos get pushed back. So I am motivated to get MY photos in albums and books.

There are many different styles and different process's to achieve these goals. I am offering a Free Focus on Photos introduction Class. We will go over the different types, styles, and ways to get our pictures into albums and books (including organizing) Then there will be different workshops available to sign up for to help you follow through with your goals. For additional information and a full schedule Click Here .  Contact me at spdabling@msn.com to register for any workshops.

Votes are IN!

Ok so I had a few of you comment that you would like to see me continue and some of you cancelled your subscription. SO….

I think I will give it another chance and re-invent it, which means maybe more photography and “other” digital tips and still some tips using CM products. I am actually thinking of re-designing the layout too, so give me a month and lets see what happens :)

Thanks for all your support, I wasn’t even sure you were still out there :)


Hugs

Shannon

MIA

Sorry I have been MIA here. Ever Since Creative Memories started their own blog, (and it is way more awesome than mine) I can’t really compete, so I am not!

Please Check out the Software Solutions and Ideas and All about images….well check them all out! You can also subscribe to them too.  I think that it might mean an end to this blog, or I might just have to re-invent it. What’s your vote?


Shannon

New Creative Memories Digital Center

Starting Nov 1 the photo center was replaced with the NEW, Revamped, and totally awesome Digital Center!!

Click here to go to the New Digital Center

image

This is a beautiful website!!! BTW November is a great month for Savings from the Digital Center.  Click Here to see Special Offers!!!

New Creative Memories Digital Scrapbook Calendar

Tech Tips, New Product Review


6a0120a5490d2f970b0120a644b1b0970c

I am so excited about this NEW product! You can download free templates for this from my site HERE

 147143-2 147143-1

These are available for purchase through the CM photo center available November 1, 2009 for 20.99! What you need to know is that this is a 12x18 Calendar with the image area being 12x12. Now the really cool part about it is that the calendar tears off and then you have a 12x12 scrapbook print!!!

Dr. Mark Mizen Blogged about this calendar and you can read his post HERE

And this is a great Tech Tip Post from the Creative Memories blog too. Here is the LINK but it is also copied below.


Calendar Templates: Defining your time

6a0120a5490d2f970b0120a5e31ed1970b-800wi

tem•plate: A pattern or gauge, such as a thin metal plate with a cut pattern, used as a guide in making something accurately.

Corinne Wow. I made my first calendar pages this week. At first thought it was going to be cool to show you how you can drop in 12 x 12 pages or Page Prints you've already done into the calendar templates. However, that doesn't even begin to scratch at the surface of what you can do with the new calendar templates.

You can:
• import completed pages as photos and just drag and drop (or, you can copy/paste from another SBC+ file if you still have items you want to change)
• start from scratch and create something new
• make any photo or paper the background of the calendar
• change the calendar style
• change any month to a new month (switch January to July without starting over)
• change the color of anything in the calendar, change the fonts
• add photos, embellishments or text to any cell on the calendar

I discovered all kinds of versatility within the template. Check out the screen shots below to see some of the great things you can do with calendars.

cal•en•dar tem•plates: a starting point, a guide to making your calendars just the way you want.


Insert your already completed pages

Anypageascalendar

1. If you haven't already, save your pages as 300 dpi jpgs. From your calendar project, click on Get Photos. Import pages you want to use as photos.

2. Drag and drop on to calendar template. Size to fit the upper portion of the template.


Change the style of the calendars & adding a photo as your background

Claudia_calendar_1

1. It doesn't get much easier than this. Right click on the calendar grid to see the pop up menu. Go to "Use a different Calendar Style", choose your favorite from the pop up window.

2. Adding the photo as a background is amazingly simple too. From the content menu, choose your photo, right click and choose "Make background". That's it. (You can do this with paper too!)

3. Just like any StoryBook page you create, you can add any embellishments or type you like.

Personalize the calendar grid

Claudia_calendar_2

1. Right click the calendar grid, choose "properties" from the pop up menu. From this menu, you can change colors, fonts, spacing and more as it applies to the calendar grid. (see screen shot below)

Claudia_calendar_2a


Cells within the calendar

Claudia_calendar_final

1. Drag and drop an image or an element into any cell within the calendar. Or, right click the calendar grid and choose "Edit Calendar Cells" to add text or make other changes to the individual days of the month.

When you're all done creating your own unique and fabulous calendar grid, you can sample the grid and apply the same features to any other grid in your project.

Posted by Corinne Skoog on 10/13/2009 at 07:39 PM in Software Tips & Tricks, StoryBook Creator Plus Software | Permalink

How to Create Your Own Embellishment Files in SBC+ 3

Tech Tips

This  tip came from the project center...

From the Welcome screen click on the Manage my content Icon.

  1. The Content Ribbon displays.
  2. Select the folder where the new content will be stored.
  3. Next create a new package in the folder to import your content to.

Packages
You can create your own personal library of favorite elements, including papers, embellishments, shapes, edges, corners and colors. You can save free art, art you personally created, or single elements saved from your projects or created elsewhere. All of your saved and created items need to be stored in a package.

To create a new package, click Create on the Content panel. Then from the pop-up menu, select Create user content package. The Create a new package dialog displays. Enter a name for your new package and choose a folder to put it in. Your new package is now displayed under the My Stuff folder. To import items into your new package click on it then select the embellishments Icon in the Get from file section. The Get Images from folders dialog box displays. Browse to the appropriate folder. Next select the images you wish to import. For this example we are choosing two images and will then click on Get selected images. The images are now imported and display in the Content manager section ready for you to use