Tuesday Tech Tip
Dingbats are a font that uses shapes instead of letters.
First, Check out these free sites that have LOTS of dingbats
http://www.urbanfonts.com/free-dingbats.htm
Download a dingbat font to a folder or your desktop. It will be a zipped folder so you will have to right click and extract the folder.
Then go to the Control Panel and open your Fonts folder. Then open the new extracted folder and grab the TrueType Font file and drag it into the Fonts folder and your new font will install. You can now delete the folders you just downloaded from the website.
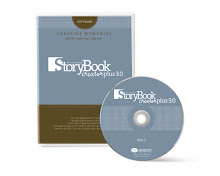
Now open your Creative Memories Storybook Creator Plus Program. Choose Open or Create a New Project.
On a Blank Page, Create a Text Box.
Then select the new font you just installed from the font menu. It will not show the name of the font but you will see the images and it will be in the alphabetical order of the name of the font.
Then type out the Alphabet A-Z.
You will be able to see all the different dingbats because each one is a different letter.
Tip: a space between each letter will make it easier when we cut them out.
Now Flatten the text box from the Layout Bar. Now you can adjust the size by dragging the corners.
By using the straight cutter tools crop the stars out in a grid pattern first by column and then by row. Then choose the option to "cut around the shaded area."
Tip: Make sure you you have all the layers selected in the row or column you are cropping.
Once your done each star should be an individual element.
Then you will save and name each one by selecting one at a time, right click and choose "Save Selection"
I named them by type and letter. So the first Star is made by the letter A, so I named it Star A.
Tip: I saved all of these into a folder that I created for all my CM stuff called "CM Content" in My Documents>Creative Memories and I always use this folder to download stuff that I will be using for SBC+
Now you have to bring these into the program by going back to the Home screen. Select the 'My Stuff' icon from the top left-hand corner.
Select File>Add Collection
Then give it an appropriate name. I would suggest using the term dingbat so you remember where you got them later. So I named mine Dingbats-Stars.
Then go to Content>Add Embellishment, browse for the folder where you saved your dingbats. Then 'Get all embellishments'
Now all these Dingbats will be available in any project from the Embellishments Panel.
And now you can use them on any page, fill with color, paper, change the opacity, etc.
Hope you enjoyed this Tutorial on Using Dingbats. As always I love to hear your feedback in the comments section of the post.
Happy Creating
Shannon


